Monday, December 3, 2012

Hatchet

One of my favorite read alouds is Hatchet by Gary Paulsen. I usually read the novel aloud while my students follow along (I have a class set). We're currently in the middle of the book and we do several reading response activities throughout the book, but a quick one I wanted to share was the following: students create a "to do" list for Brian (main character). This list can include things that are directly stated in the text or inferred from the text. I got this notepad at the Dollar Tree, but they could use regular lined paper to make their list. They made their lists individually and then shared with their group members. All of their choices had to be justified/explained to their group members. (While circulating I heard such rich discussion and debates!) For example, I overheard one student sharing he had "make a fire" on his to do list and another told him he didn't need to make a fire, he just needed to "feed" it and referred back to the page where Brian already has fire. The plus symbols are items they added after discussing/sharing with their group. The notepad came with a "to shop" for column as well, so for fun, I let the students brainstorm items Brian would get if he had one minute in the store to get whatever he wanted/needed. Below are two student samples.
 
 
This activity could be used with any novel. It's a quick activity that gets the kids thinking! What activities do you do for read alouds? I like to respond to all comments so please make sure you've disabled the no-reply blogger option so I can email you back! I appreciate your comments!
 

Tuesday, November 27, 2012

Cite Your Evidence For Common Core

 
 New Product!


I've been trying to teach my students to look back in the text and cite evidence (which is a new skill for most of them) so I created these colorful posters to help support my readers. I just put the posters up yesterday and they're already starting to use them! I couldn't resist showing them the mini poster key ring (see photo below)...they begged me for one! Haha (I told them if they were really good I might give them one!) Actually, I only made 6 for my reading groups; I didn't realize they'd be in such high demand! They're great visuals for students to use when learning to cite evidence after reading to support their answers. The posters are "stems" to aid students with their responses. Included in the poster set is a page of mini posters that can be used for a key ring like I've done or a reference tool for their reading folders. These posters are aligned with Common Core. Check out my new product here.
 
I'm so happy to see my students excited about using a "reading" tool to benefit their learning!
 

Tuesday, October 2, 2012

Personification

Don't you just LOVE when you create a lesson by accident??!!
I was "practice" reading one of the books from my "pile of picture books" to my daughter the other night before bed when I realized Hurricane! would be a perfect book to use during writing! I was surprised at the amount of figurative language (personification and similes) used throughout the book! We've been talking about personification and my students love when they find examples in their reading. After I read it one time through for pleasure, I asked my students to reread it and look for examples of personification. I typed up this story so we could highlight all the sentences. They were very excited to work in groups and share "their findings"!

Hurricane!

Some examples from the text: "Lightning scribbled on the dark clouds that had buried El Yunque." "Fists of wind pounded me, punching me sideways."
Great read aloud to teach an author's craft. How do you teach personification?

Wednesday, September 26, 2012

All About Me Project

A fun and creative way to build community and learn about each other is this All About Me Project! Students cut a piece of poster board in a shape that represents them {I would make a high heel because I collect and love them!}. Students draw, cut out, use clip art, etc. for items that describe them for five different categories. Students give an oral presentation for their projects and then the projects are displayed. (Great for Open House). Below are some student samples.


Balance Beam & Video Game Controller
 
Sunglasses
 
Purse
 
They added their own style to their projects and were very proud of their hard work. Even my students who are reluctant to speak in front of their peers, felt comfortable sharing something they know about (themselves). My students learned a lot about each other's families, interests, and favorites. I loved hearing the comments, "I didn't know you liked gymnastics" or "He likes the same books as I do." These projects gave them new perspectives about each other. Click here to go to my TPT store.


Tuesday, September 25, 2012

Open House Tips & Tricks #2

I apologize it took so long to post this second tips and tricks...it's been a little very crazy! If you've already had your Open House, save it for next year, if not, hopefully you can use some of these ideas!

Wish List Labels: These are the labels from an (earlier post) that were displayed on a table for parents to select items to donate to our classroom. The prices range from $1-unlimited (gift card) offering every parent an opportunity to feel like they're helping their child's class. The "hands" are displayed when parents walk in and I also put a "plug" in at the end of my presentation. You can use the labels on any cute cutout or die-cut you have available. (These hands are from Dollar Tree).


Goodies For Parents: I wanted to show my appreciation to my parents who attended Open House so I had these treats waiting on their child's desk as a thank you. (Mints are sold in big container from Sam's, bags are from Michael's and I made the tags).
 
 
Goodies For Students:  Can't forget the kiddos! I picked up packages of erasers at Office Depot this summer for 5 cents each! I didn't pass them out at the beginning of school thinking... I could use these for something! So, of course, I came up with this little saying literally at the midnight hour before Open House! My students were thrilled to see a gift for them on their desks and they can always use erasers too! Isn't it awesome when you can be a hero for 5 cents??!!


Sunday, September 16, 2012

Open House Tips & Tricks #1

 
Invitations: I have my students make invitations to bring home the week before Open House to increase attendance. Possible ideas I've used: student made postcards that I've mailed home, 5x8 student decorated index card with magnets on the back to put on refrigerator, construction paper house, etc. This year I got a deal on some fancy invitations with envelopes that my students put all the important information on to go home (who, what, when, where, why). When students ask their parents to attend an event rather than getting an invite from a school flyer, they're more likely to come.
 
Survey: Use this Open House Survey to find out about your parents' needs prior to Open House Night. This survey will give you information about any confusion or questions your parents may have about your classroom. This will help you with your presentation and eliminate questions (that several parents may have) that evening. Also, at the bottom of the form is a place to RSVP to the event. This form is a reminder, a survey, and a chance to respond all in one! This is a Word Document so customize it to fit your needs: date, name, special font, etc. Click on the image to download.


Science Experiment Sign Up Sheet: Use this sign up sheet at Open House to have parents help out with the cost of science experiments. Parents are usually willing to help out and this will help alleviate some costs to you! Have sign up sheet available on table when they walk in. Keep this sign up sheet with your plan book and notify parents a week in advance to gather up the materials. Click on the image to download for free. Please follow me and rate the product-it's greatly appreciated!
 

Hope these ideas help your Open House event! Stay tuned for more tips tomorrow!
Have an idea? Please share.


Tuesday, September 11, 2012

Parking Lot to Hold Questions


I love using this parking lot to help with my classroom management. I find it the most useful during my guided reading groups. (It seems to be the time that all my students want to talk to me or have a question). I want my guided reading to be focused on only the students at my table, so my other students will write their name on a post-it and "park" it on the parking lot until I can get to them. I try to answer their questions in between groups or when I've given my guided reading group a task to complete. I have also given them procedures of what to do while they "wait" until I can answer them...skip the question they need help with, ask a group member, move on to another assignment. Of course the first day I put the parking lot sign up I have a BUNCH of post-its-they all just want to try it out! Another time I find this tool beneficial is when I'm working one on one with a student. This simple sign just eliminates any interruptions and at a quick glance I can see if anyone needs my assistance. Students can post their names or their questions. I made this poster (11x14) and have the students use the mini post-its. (Sam's Club develops this photo/poster for $2.87). This poster is available at my TPT here.


Wednesday, September 5, 2012

Independent Reading

 
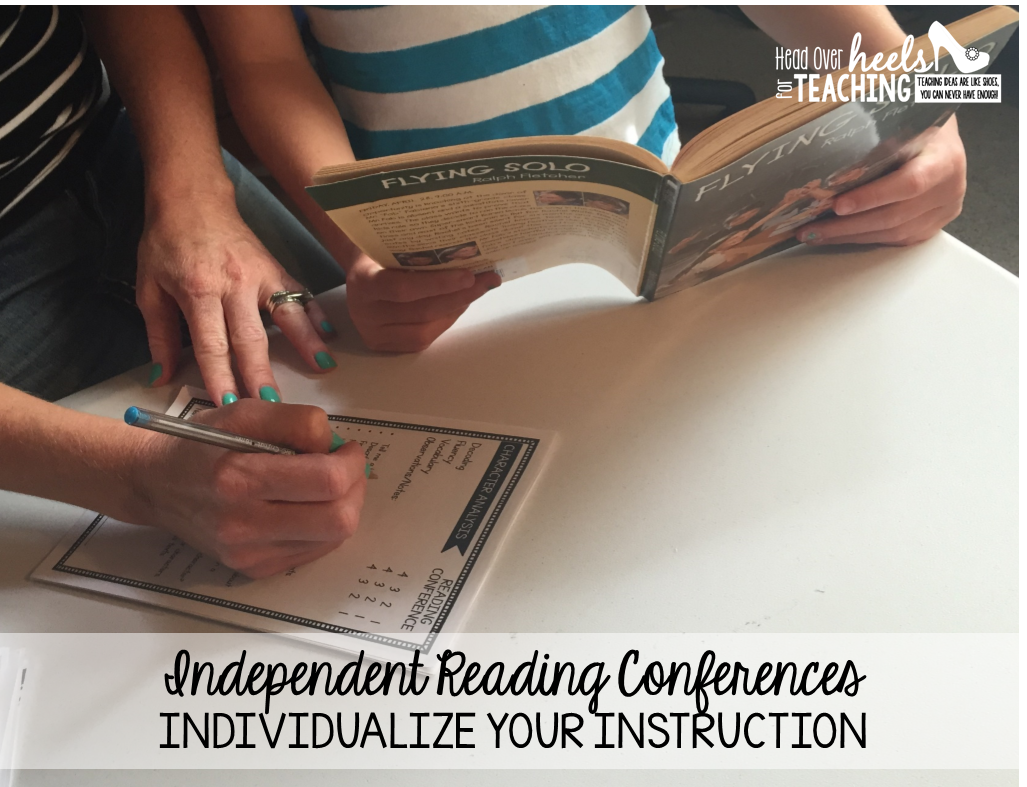
Independent reading is so important to my reading program and it's one of my favorite times of the day! I love seeing my students so engrossed in their books, begging me for just five more minutes of reading time. This time builds fluency, vocabulary, background knowledge, and better writers. Although this time is for my students to choose books of their interests and personal choice, I do want them to select good literature that challenges them. I try to steer them in this direction during conferences if I see a repeated pattern of  selecting "easy" or "too hard" of books. They set goals and pace themselves to complete their books with my frequent "check-ins" during the week.  
My students have independent reading for about 20 minutes every day. We have a school wide reading time for 30 minutes on Fridays (I get to read too!) Students need to see their teachers as readers. I take turns sitting in different sections of the room and sitting with different students. I share my thoughts about the books I'm reading and the highlighting I do to professional books. Books should be loved and I want them to see my "thinking" while I read!
Before I begin independent reading in my classroom, I survey my students to see what independent reading  looked like for them in previous years/classrooms. I get a range of responses so we make an anchor chart together of the expectations they have (and what they think I will have) during this time in our classroom. My students were very thoughtful (see below). I feel this reading meeting gave me insight about my students and it gave them ownership of this time. 
 
 
Closer view
 
 
I share this research (below) at Open House to help the parents understand the importance of reading at home and outside of the reading block.These statistics are eye-opening to parents.


Leave a comment, I'd love to hear about your independent reading!


Wednesday, August 29, 2012

Building a Reading Community


One of the first reading lessons I start with is having my students bring in their favorite book. Each student shares their favorite book with the class and tells why it's their favorite. In this brief time I am able to gather information about my students' interests and level of reading they choose to read. During this meeting on the carpet I was able to introduce the importance of underlining a book title, the use of quotation marks, and identifying genres. After everyone shared, I asked the students what they learned. I thought they would reply...underline the title of a book, use quotation marks when someone is talking, etc. Surprisingly, the students made some deep connections within our class. Their responses showed more depth of knowledge than I anticipated: "No one picked non-fiction as their favorite book," "A lot of kids in our class like series books," and "A lot of students like realistic fiction." Their responses reflected the class as a "whole" and not individual observations. I felt like a proud mama!!! On the second day of school we were already forming our class family and reading community.
This is just a sampling of some of their responses:


Not only did the students learn something new, so did I! This informal "assessment" will drive my future reading plans. Without any "test" I know that my students need more exposure to non-fiction reading material and need to be guided toward more challenging reading choices. Sharing our favorite books with each other exploded into an excellent learning opportunity for everyone. Now my students know a little more about each other and their reading interests, which will help later when forming literature circles and/or reading partners. 


Wednesday, August 15, 2012

Monday Made It


I'm linking up with Tara from 4th Grade Frolics for Made it Monday again! Sorry I'm a little late... my projects have been finished, but haven't had time to post-crazy first week back to school!


READ Letters:
I picked up these wooden letters from Michael's. First, I glued scrapbook paper on the letters using Modge Podge. Then, I cut around the letters with an Exacto knife to trim the paper. Finally, I sealed the letters with a layer of Modge Podge (glossy finish). They will go perfectly with my black & white theme!


Custom Rubber Stamps:
I didn't actually make these rubber stamps, but I did design them! Disclaimer: I really run across the desks, not dance so much, when I have a very exciting teaching moment!!! {I've been doing this since my first year teaching, so I need to keep up the tradition!} I love the heel-it just completes it! I can't wait to use that stamp-I hope somebody does something amazing on the first day of school so I have an excuse to stamp away! :) The second stamp is just something I like to say when I celebrate, so I thought I should stamp papers that should be celebrated too! This is one of my favorite summer purchases at Office Depot!


Student Medals:

These medals will be used as an incentive for students to do their best on a test to earn the privilege of wearing a medal for the day! (I bought 18-I'm hoping for lots of high scores/improvement!) I bought the medals at Target Dollar Spot (2 pack). Actually, that's not true... my fill-in mom, Judy, went hunting all over for me while I was on vacation and found the idea from Lana from 4 the Love of Teaching. (I couldn't convince my family to take an excursion to Target!)


Post a comment...I'd love to hear from you!

Saturday, August 11, 2012

Fabulous Find Friday

I'm excited to be linking up with Elizabeth at Fun in 4B for her Fabulous Find Friday linky party!


Photo Box Carrying Case:
I found this photo box carrying case at Michael's. It holds 18 individual photo boxes. They are the perfect size (4x6) to hold index cards, flashcards, center game cards, etc. I originally bought just a few of the photo boxes (about $0.80 each with coupon or sale) to hold my index cards, but then this carrying case to house all the little boxes caught my eye! I just love how organized it looks! So...of course I bought it! About $20 with coupon and teacher discount. {It's an organizational investment!}


Individual Photo Boxes:

Here are some examples in use-quick and easy to find the center or activity you're looking for with the clear cases.


I use these cards for a pocket chart center for word work. I have several different cards and alternate them when using this activity. They will be at my fingertips with my new case!

Student Awards:

I picked up these cute little trophies at the Dollar Tree. The reason I liked them is because I could personalize a label for featured students or a specific incentive on the large black base. I used the 30 count labels. (In case you couldn't tell from previous posts, I like to label everything!)


Acrylic Frames:


I found these at the Dollar Tree too! I use these acrylic frames to display directions for a center or to show a student sample. They are 8x10 picture frames, so you can trim your paper or tape it to the front. I  bought them in landscape and portrait style. 

Wednesday, August 8, 2012

Classroom Decor

Want to save money and have your students take ownership of their classroom?
One of my absolute favorite activities at the beginning of the year is for my students to decorate our classroom. They make posters using inspirational quotes to be hung around our "home away from home". I used to buy inspirational posters to hang in my room from teacher stores and catalogs each year and then I thought what a great way to build community and personalize our room with student posters! Each student selects a quote/saying that fits their beliefs/values and illustrates how they interpret the quote/saying. With this activity you get student buy in for the kind of climate you want for your classroom. It sets the tone for the year. These are great to have displayed at Open House! The samples below are from previous students. Each year I hang them all over our class. We get so many compliments and even get requests for posters to be hung around the school! Great self-esteem booster! All illustrations must be outlined with black marker (this really makes them pop!) and no white on the paper unless it's supposed to be white (ex. clouds).


The quotes are about friendship, leadership, team building, and making good choices.

Tuesday, August 7, 2012

Made it Monday


I'm very excited to be linking up for the first time with Tara from 4th Grade Frolics for Monday Made It! Yay! I started blogging last Saturday and left for vacation on Sunday~very tricky! I've been busy with a few projects-take a peek!


Project #1: Customized Binder Clips

I was inspired for this project by a teacher catalog-I knew I could make them for less and I wanted to customize them for my classroom.


I bought the assorted colored binder clips at Office Depot and used clear labels (return address/80 count). I made the first set for my organization soul mate, Amber, but after a couple of hours the clear label was starting to lift. The consistency of the label wouldn't adhere to the metal. Don't worry, I have other labels!


Binder Clips......Take Two:


I used the white return address/80 count labels for these. I also plan to buy some additional clips for subject areas as well. While making these clips, I thought these would be perfect for a substitute! All subjects would be clearly labeled and if you're planning more than a one day absence, the days would be labeled as well. All that organized cuteness for a little over $3!


Project #2: Treat Jar


My plastic treat containers were several years old and no matter how hard I tried to clean them, they just looked dingy. So...I made a trip to Target and found these glass, screw-lid containers. I made a scalloped label for each container-the chocolate one says, "Mrs. Miller's Treats". I don't have a picture of this one because unfortunately it's empty. :( 

Project #3: Happy Teacher Box

This project idea came from Jena Snowden from 1st Grade with Miss Snowden. Here is the finished project to give to my teacher friends. All the goodies were purchased at Target, Office Depot, Dollar Tree, and Walmart. The boxes were purchased at Hobby Lobby. Scroll down to see close up pictures.


Pink theme and blue theme.
Included in kit: timer, book rings, gum, push pins, staples, paper clips, post-its, rubber stamp, binder clips, hand sanitizer, sanitizing wipes, and Dove chocolates.


Project #4: Sharp and Dull Pencil Buckets

I posted labels for these buckets on an earlier post, but I just got around to sharpening all those pencils and finishing my own buckets. I also made them for my children's teachers~it makes a nice welcome back to school gift. The polka dots were made with white contact paper and a circle hole punch. I tied ribbon around the handles to finish it off.


Let me know what you think! Leave a post if you have a comment, question, or other use for these projects!
Related Posts Plugin for WordPress, Blogger...